
Settings
The Settings view allows you to modify the configuration of your Azupay account on your own. Available options include:
- Generate / Regenerate API keys
- IP Whitelisting
- Enable TopUp PayID. Used to top-up your account balance for outbound payments
- Configure webhook events for transactions
- Enable
Thin Payloadfor webhook events - Enable and customise the behaviour of your MT940 report
- Customise your Daily Transaction Report
- Configure your account to receive Credit Card payments using Cybersource.
- View details of the current account's configuration setup
You can get to a specific setting in one of three ways:
- Left-hand menu - Click Settings in the main navigation, then select the setting you want from the list underneath it (for example Card payments or IP Whitelisting).
- Filter by category - Use the Filter by buttons above the settings list (Payments, API & Webhooks, Security, Reporting, Appearance, Configuration) to narrow the list down to one category of settings.
- Search - Use the search box on the top-right of the Settings page to find a setting by name or keyword.

Manage API Keys
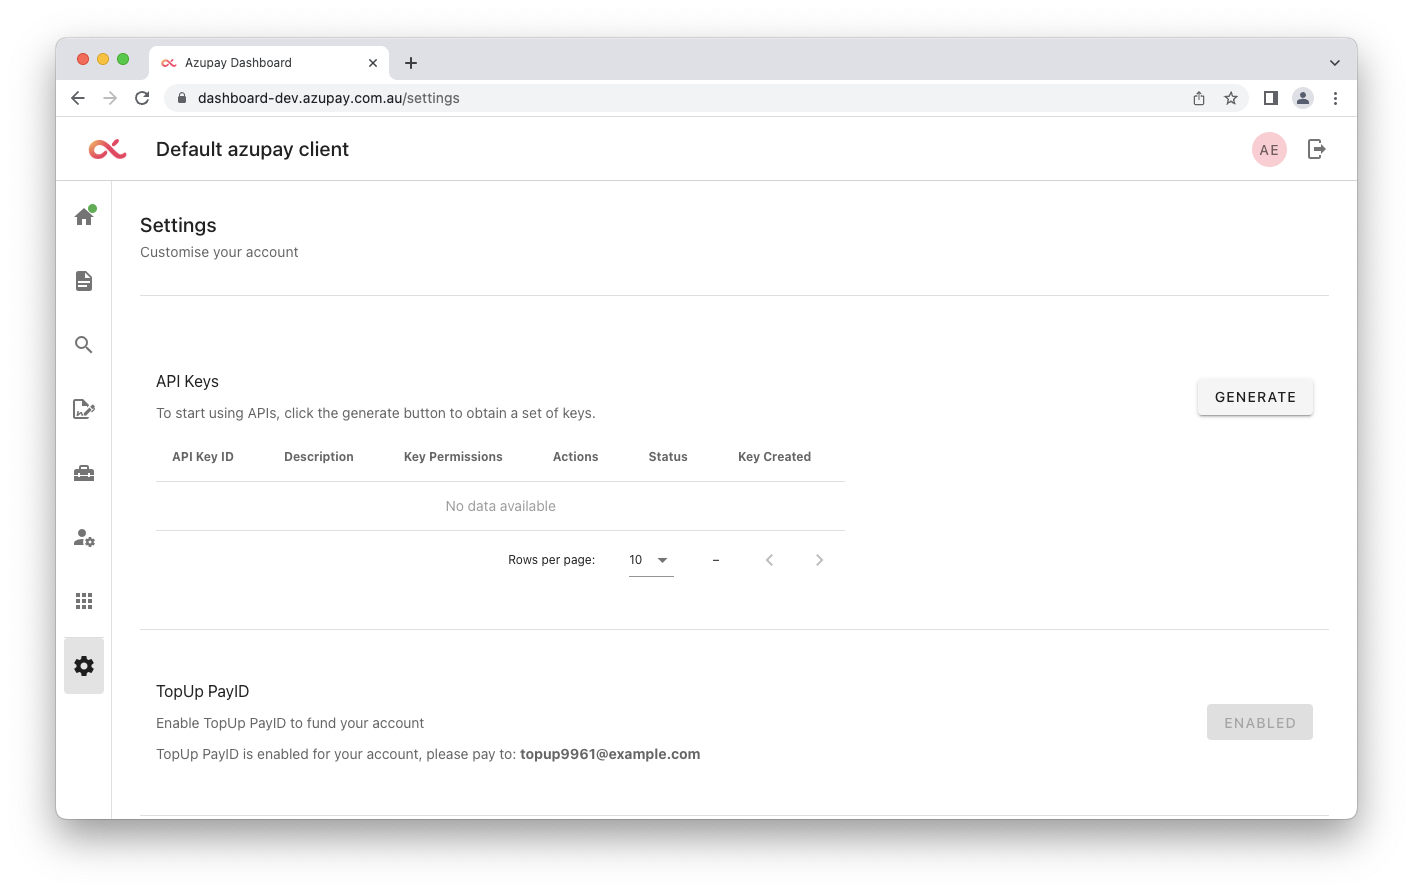
The API Keys settings allow you to generate a new set of secret and distributable keys. Click the Generate button to generate them.
You will be presented with confirmation dialog. Click Yes to confirm the generation.
You can choose to generate HMAC keys to write signature headers for your requests.
HMAC adds additional security to your system messagesHMAC Headers provides a way to verify data has not been tampered with in transit, verifies timestamp when it was sent and by whom.
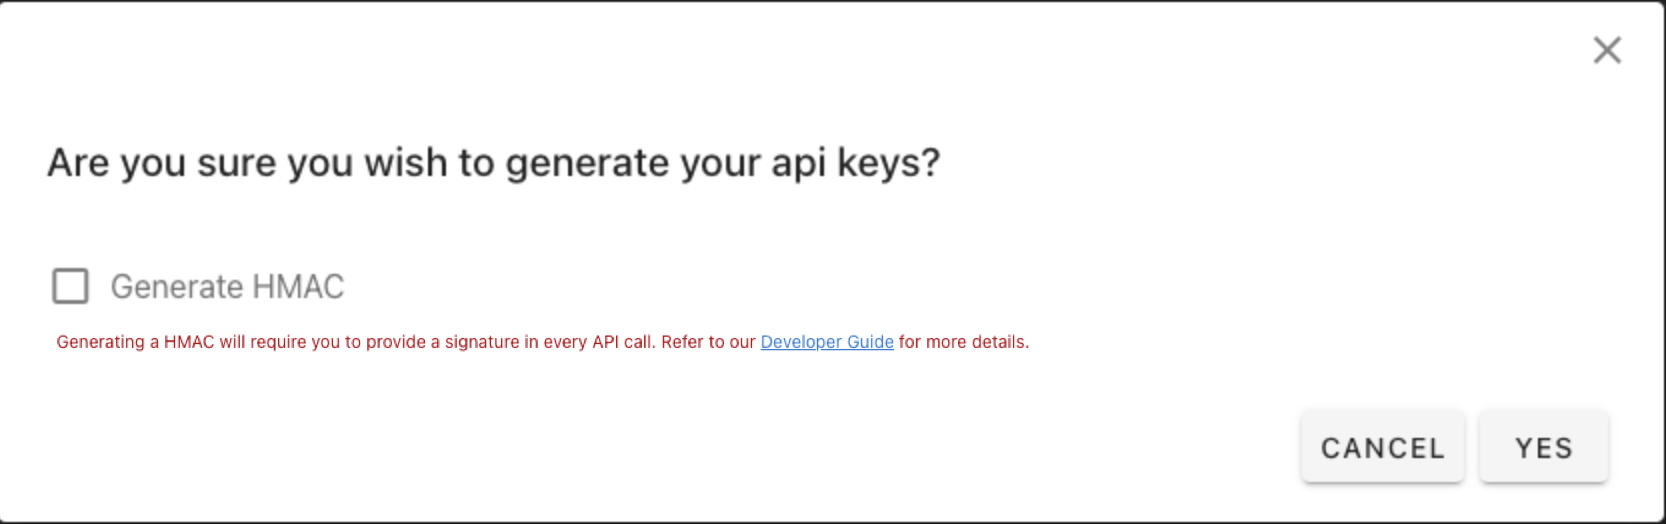
HMAC as an additional security measureAPI keys with HMAC enabled will require all API calls to have a valid signature to prevent tampering as a security measure. All API calls without a valid HMAC signature will fail - only enable this if you understand how to provide the HMAC signature.
Once generated, the secret and distributed keys will be displayed. Copy and save it in a secure location as this is the only time the keys will be displayed. Azupay does not store the API keys for security reason.
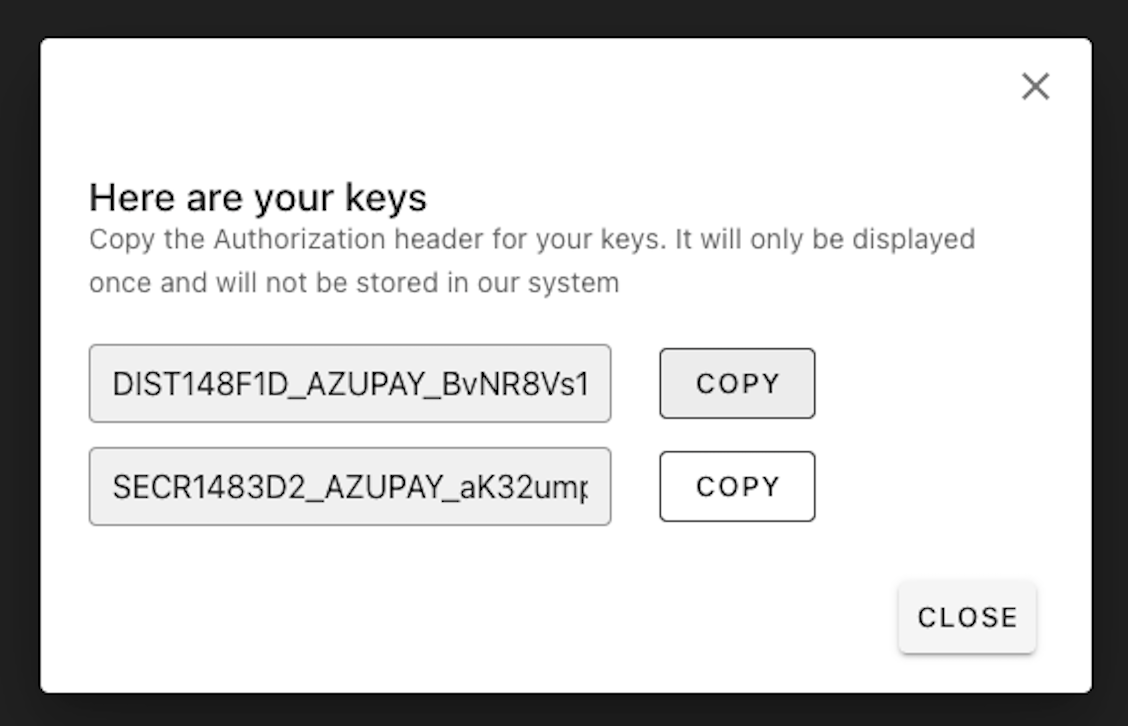
Click Close to return to the Settings page and the new key's information will be displayed. This includes:
- API Key ID
- Description
- Key Permissions
- Status
- Key Created
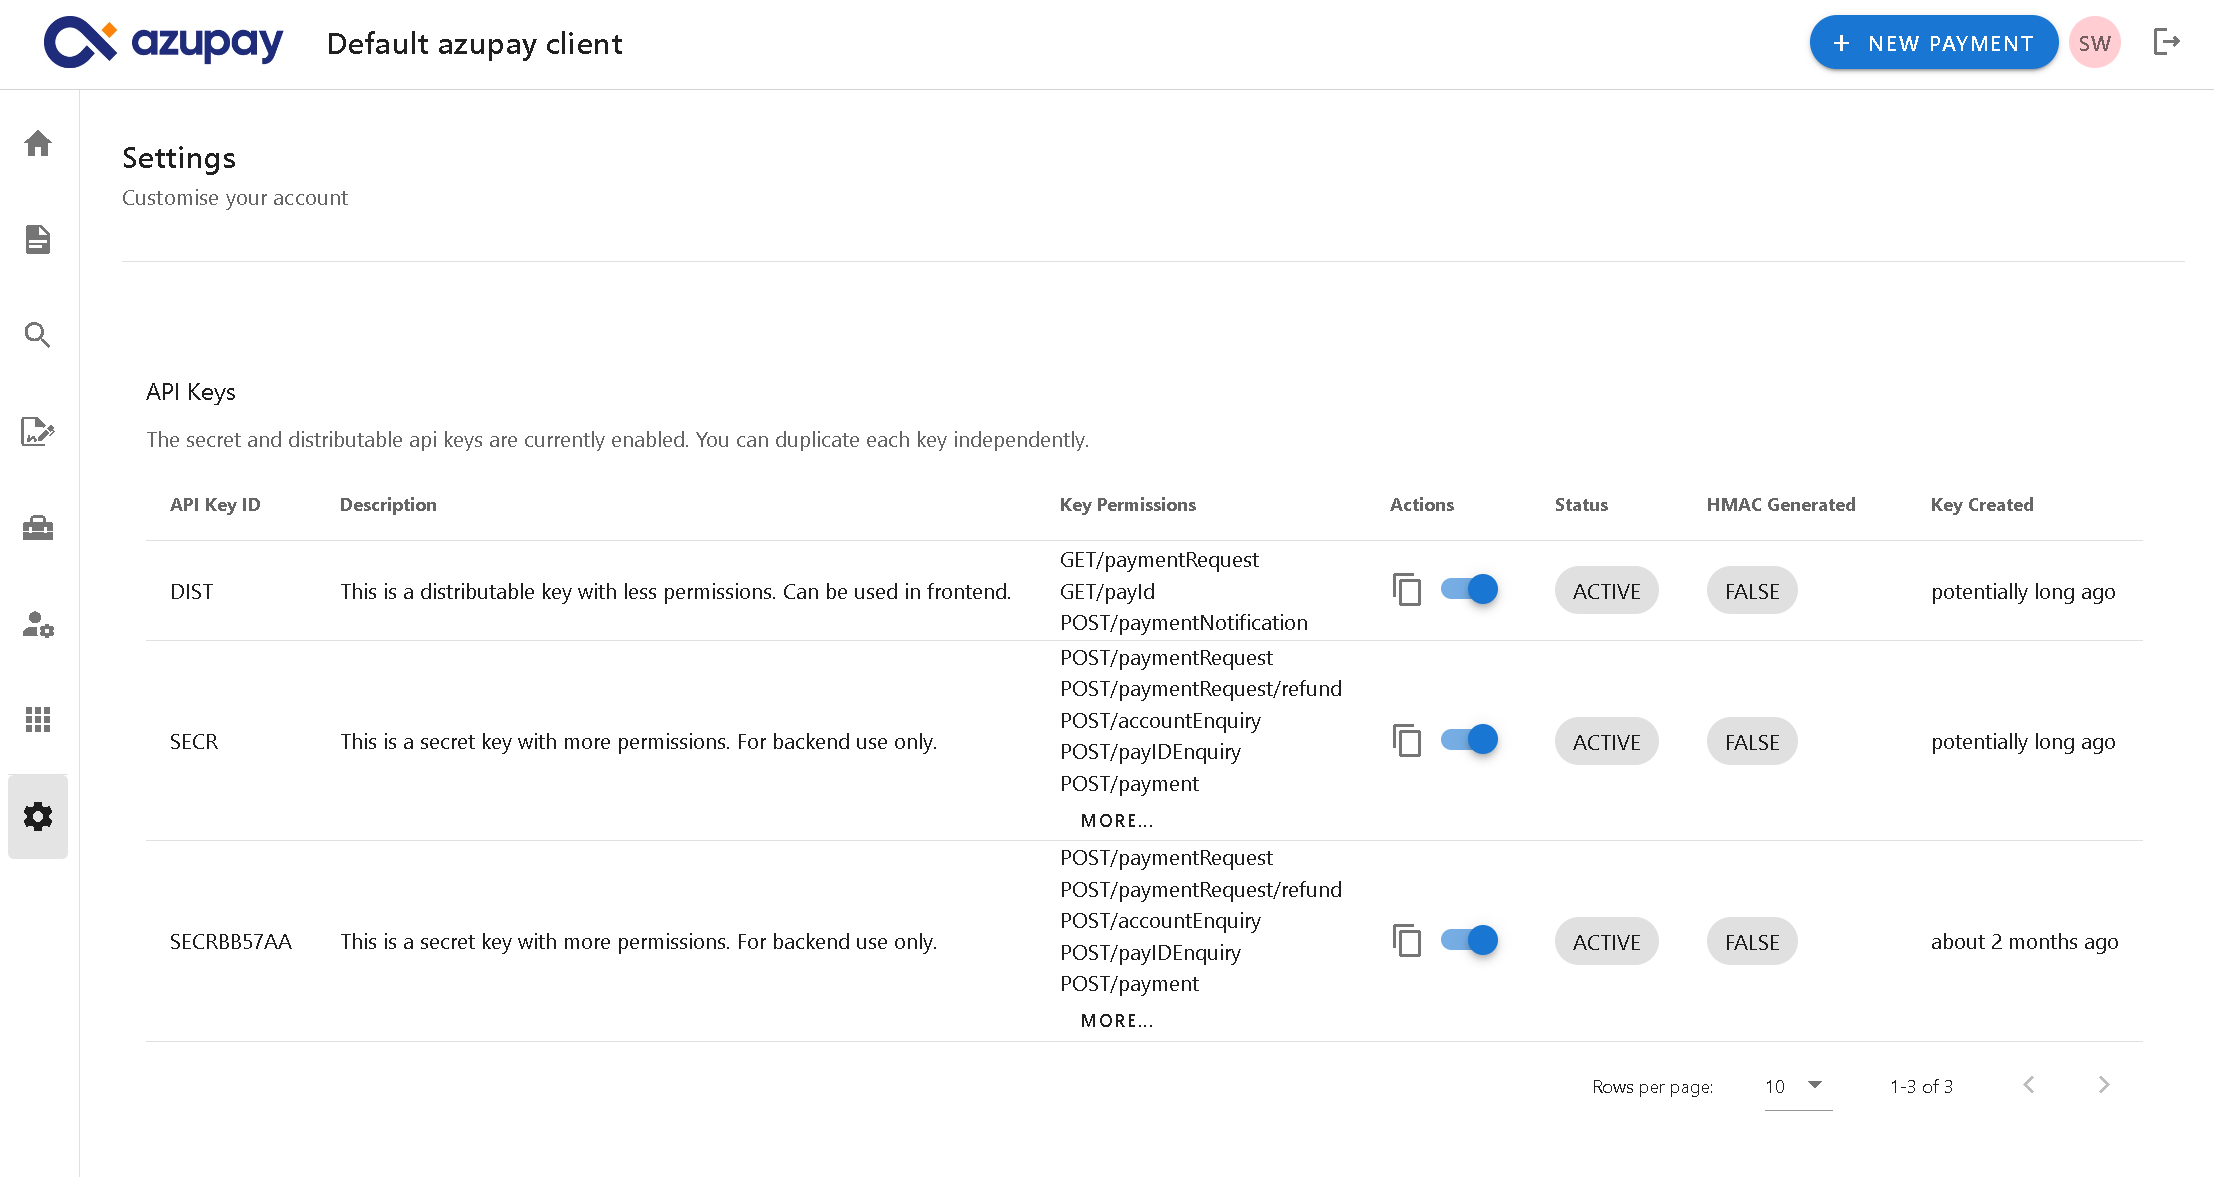
In the Actions column, you can active/disable the keys. Click the switch icon to active/disable them. Once you click the switch icon the status of the key will change to ACTIVE/DISABLED.
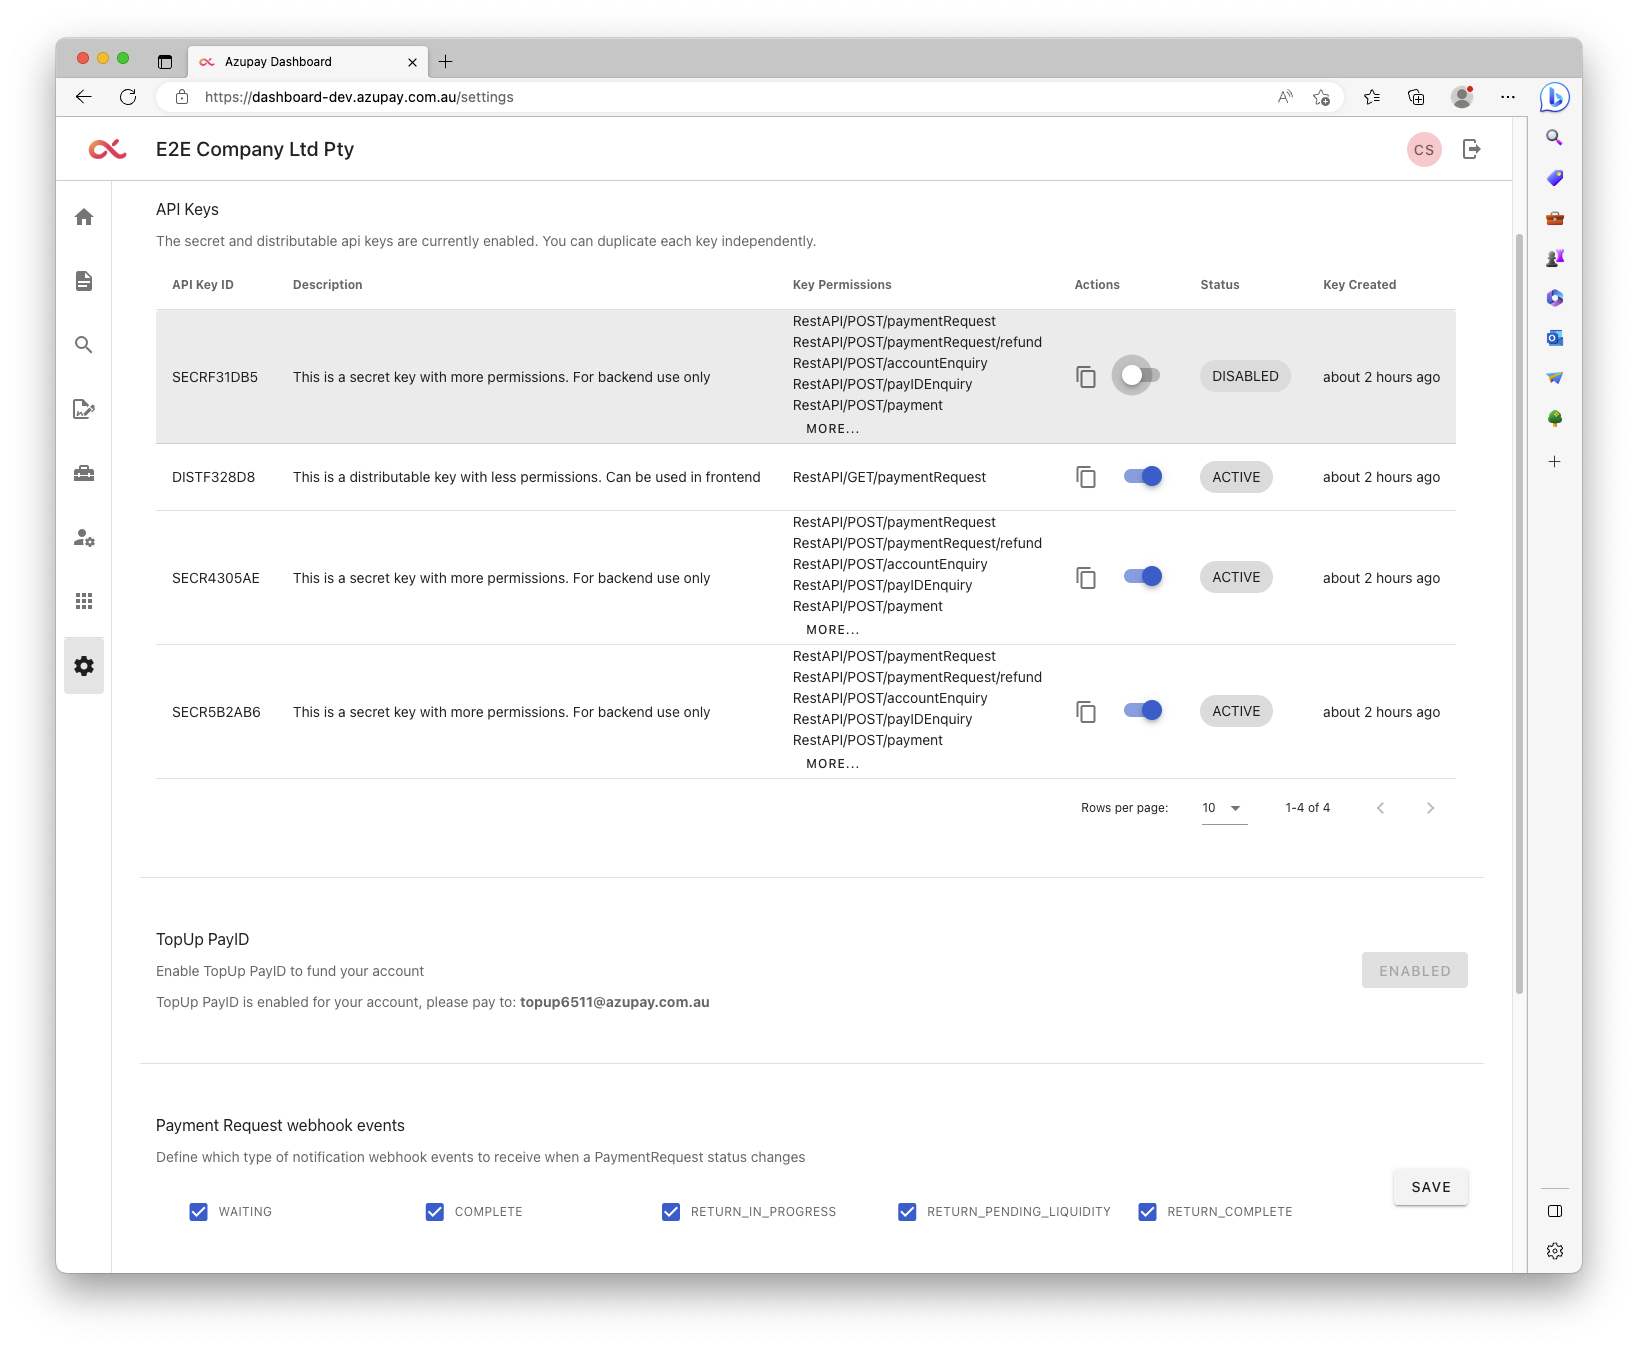
You can ACTIVATE the DISABLED key by clicking on the action switch icon.
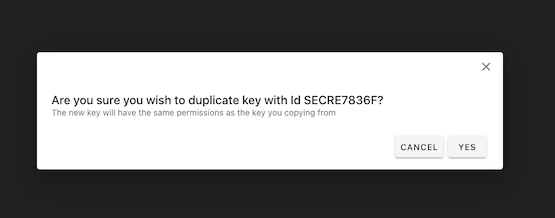
In the Actions column, you can duplicate existing keys. Click the icon to duplicate them.
You will be presented with confirmation dialog. Click Yes to confirm the duplication.
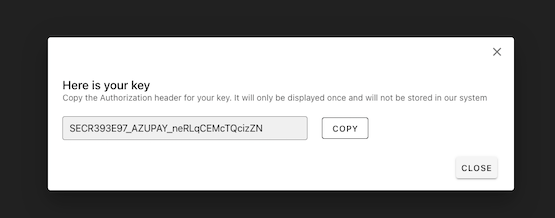
Once duplicated, the key will be displayed. Copy and save it in a secure location as this is the only time the key will be displayed. Azupay does not store the API keys for security reason.
Click Close to return to the Settings page and the new key information will be displayed.
HMAC Keys
Secret API keys can have a companion HMAC key attached to it.
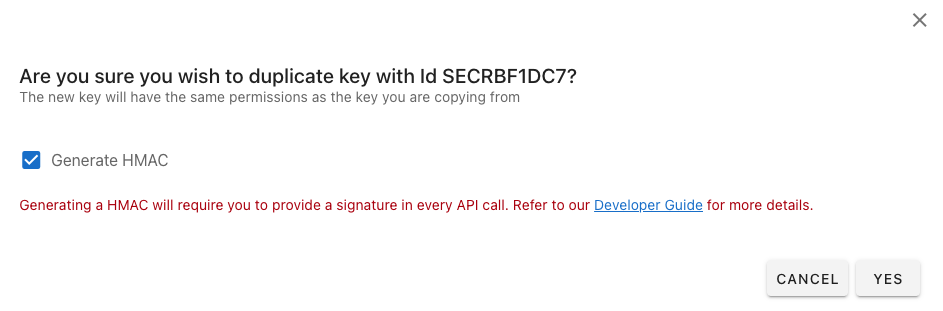
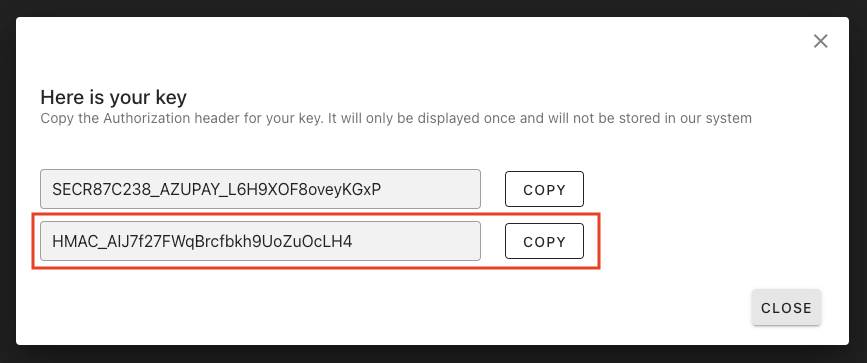
Like the api keys, the HMAC key is only displayed once after the generation.
In the dashboard you can verify which api keys have a HMAC key attached to it.
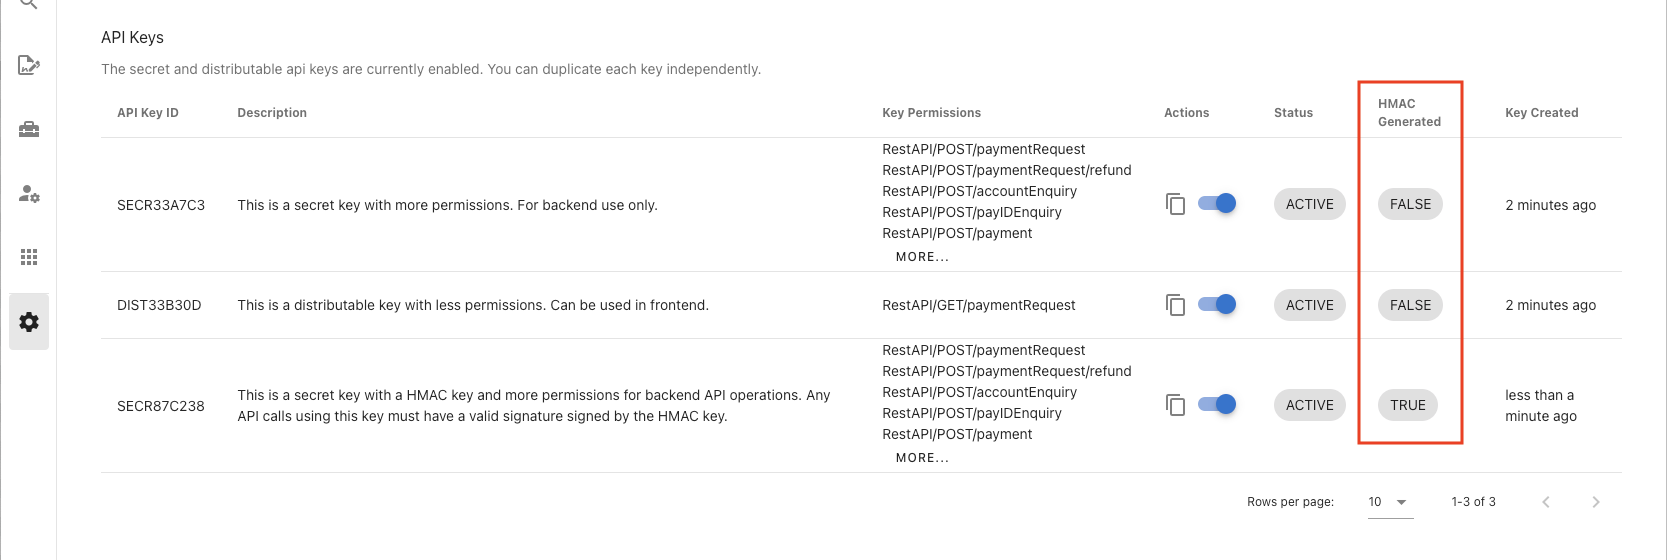
You can use this HMAC key to sign the payloads on POST and PUT requests made with the companion api key.
Api keys that have a HMAC key attached, will expect a x-hmac-signature on POST and PUT requests.
Sample code to make signed requests:
const crypto = require("crypto");

const hmacKey = '{{YOUR_HMAC_KEY}}'

const body = `{
  "PaymentRequest": {
    "clientId": "{{CLIENT_ID}}",
    "clientTransactionId": "c0e35aad-c9a8-45e8-be41-30794f138b9c",
    "paymentDescription": "Client test transaction",
    "paymentAmount": 1000.00
  }
}`

const hmac = crypto.createHmac('sha256', hmacKey);
hmac.update(body);
const signature = hmac.digest('hex')

axios.post(`${url}/paymentRequest`, body, {
  headers: {
    'Authorization': key,
    'Content-Type': 'application/json',
    'x-hmac-signature': signature
  },
});
Requests made using api keys that have a HMAC key attached will fail if:
- The request does not have a
x-hmac-signatureheader - The signature and the body do not match (body have been tampered)
- The key used to sign doesn't match the key in the api
Any of these scenarios will return a 403 Forbidden status code.
IP Whitelisting
This setting will allow you to map certain IP addresses to access Azupay endpoints when using your API keys.

To do this:
- Within the text area, enter one or more IP addresses (each addresss on its own line)
- Then click the Save button
Notes:
- You can enter only up to 10 addresses.
- By default, the IP filter is open to all IP addresses.
Thin Payloads
The aim of this feature is to deliver just the bare minimum needed to identify a change has occurred, without exposing excessive data.
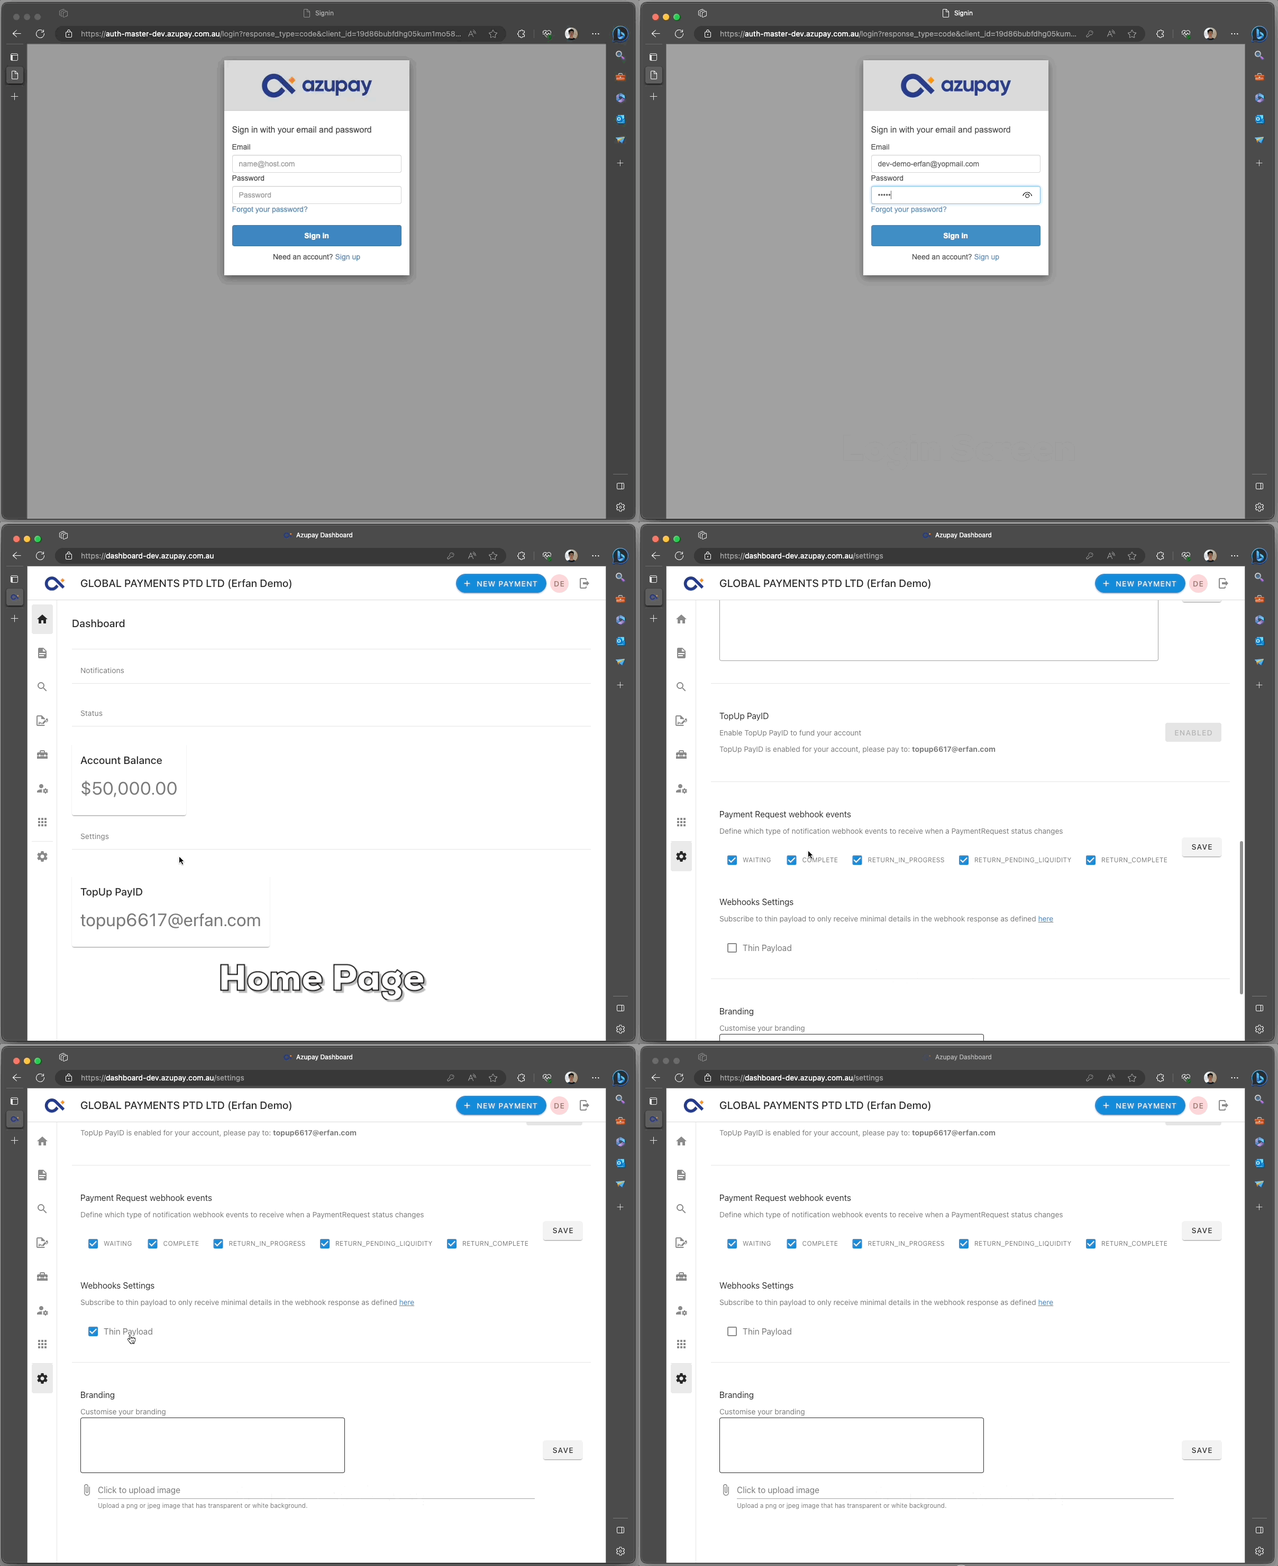
Thin Payloads are only available for PayTo suite of APIsThis feature is currently only available for the AzupayTo product entities which includes:
- Payment Agreement
- Payment Initiation
- Payment Agreement Amendment
| Entity | Fields | Example |
|---|---|---|
| Payment Agreement |
| { "PaymentAgreementStatus": { "paymentAgreementId": "732496cc3a804856d4a6c61382199e93", "status": "ACTIVE", "previousStatus": "CREATED", "lastStatusBy": "PAYER" }, "lastUpdatedTimestamp": "2023-06-20T00:52:46.000Z" } |
| Payment Initiation |
| { "PaymentInitiationStatus": { "paymentInitiationId": "51a4151b96934d704204e3a0d891c04d", "status": "SETTLED" }, "lastUpdatedTimestamp": "2023-06-20T00:57:47.450Z" } |
| Payment Agreement Amendment |
| { "PaymentAgreementAmendmentStatus": { "paymentAgreementAmendmentId": "44a5ea0f54da0144f50b8225ce1ef854", "amendmentStatus": "COMPLETED" }, "lastUpdatedTimestamp": "2023-06-20T00:59:31.000Z" } |
Thin Payloads are not compatible with Azupay AppsAs the thin payload restricts information available required for Azupay Apps to process the payment, please do not enable thin payloads if you are using Azupay Apps.
Manage OAuth 2.0 access from the Azupay Dashboard
You can now view and manage OAuth 2.0 access from the Azupay Dashboard.
If OAuth 2.0 is available for your client profile, users with an ADMIN or TECH ADMIN role can enable it from the Dashboard Settings area. This is typically enabled for enterprise clients, reach out to our Support team for more information.
Once enabled, the Dashboard displays the details needed to integrate with OAuth 2.0, including:
- client_id
- token endpoint URL
- grant type: client_credentials
- token expiry: 3600 seconds
- permitted API scopes
When OAuth 2.0 is first enabled, the client_secret is shown once only. Copy and store it securely, as it cannot be retrieved again later from the Dashboard.
The permitted scopes are view-only in the Dashboard. If your organisation needs scope changes, contact Azupay support.
Card payments
This setting allows you to connect your Cybersource account so you can accept credit and debit card payments through Azupay. Card payments require Unified Checkout to be enabled on your Cybersource account.

Credit card payment settings
To connect your account, enter the following details from Cybersource and click Save:
- Merchant ID - Your Cybersource Merchant ID (also referred to as the Organization Identifier or MID).
- Key ID - The Key ID generated from your Cybersource account, used to authenticate requests.
- Shared Secret Key - The Shared Secret Key generated alongside your Key ID. Click the eye icon to reveal the value while you enter it.
All three fields are required before you can save your card payment configuration.
Unified Checkout must be enabledCard payments are processed through Cybersource's Unified Checkout. Confirm Unified Checkout is enabled on your Cybersource account before connecting it here, otherwise card payments will not process correctly.
Keep your Key ID and Shared Secret Key secureTreat these values like any other credential. Anyone with access to them can process card payments on your behalf. Azupay does not display the Shared Secret Key again once it has been saved.
Client configuration
Client Configuration gives you a read-only view of the key configuration values held against the account you are currently working in. Use it to confirm how the account is set up without opening a support ticket or using internal tools. The section does not change any configuration. Editable settings remain in their existing Settings sections and in Apps.
Client Configuration sits in the Settings submenu and under the Configuration category chip. Selecting it from the submenu scrolls the section to the top of the page.
The configuration is scoped to the selected account. Switch accounts using the client switcher at the top of the Dashboard to view another authorised account's configuration.
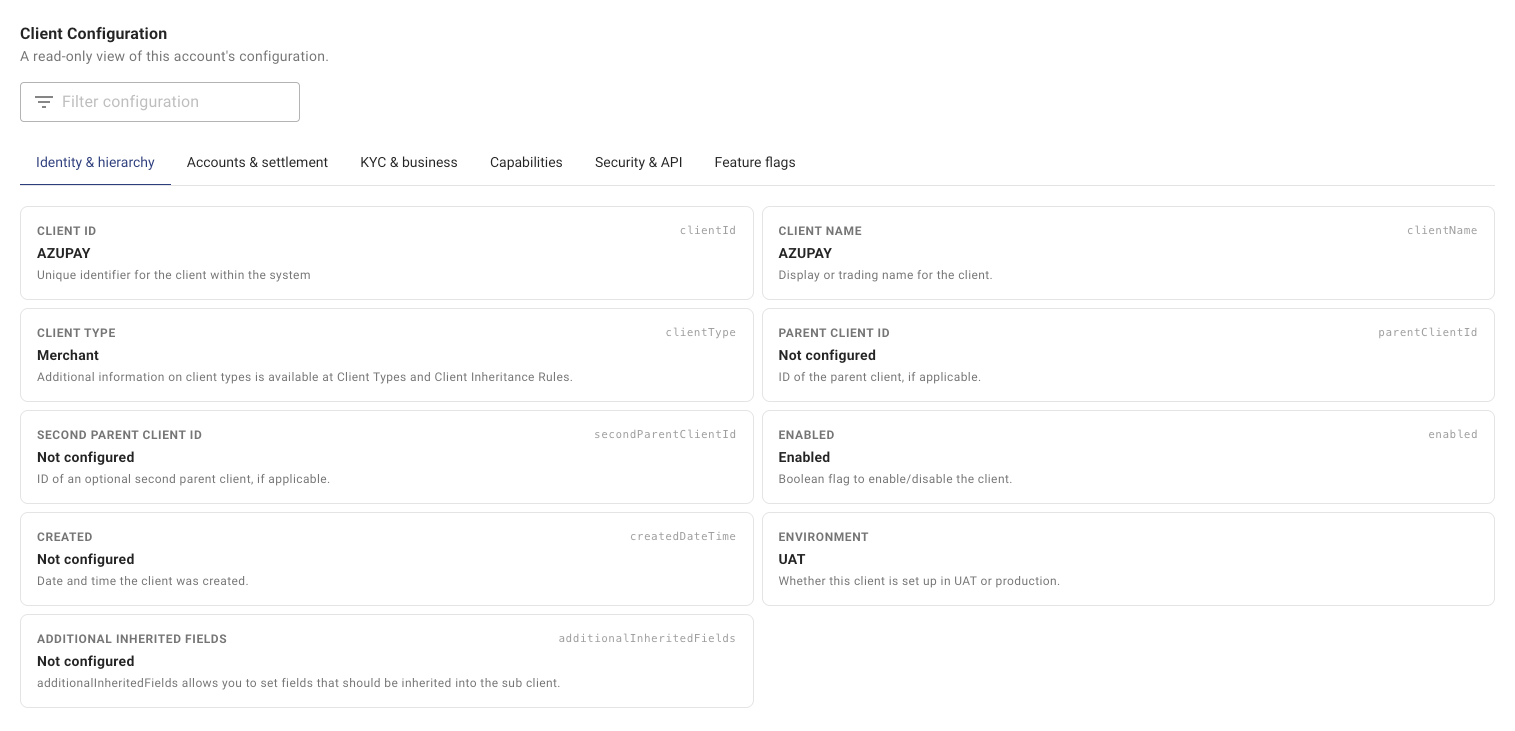
Reading the configuration
The section opens with six tabs. Identity & hierarchy is selected by default. The tabs always appear in the following order:
- Identity & hierarchy
- Accounts & settlement
- KYC & business
- Capabilities
- Security & API
- Feature flags
Each tab contains a set of configuration cards. Each card shows the field label, the underlying config key where one exists, the current value, and a short explanation of what the value means.
Values are displayed in business-friendly Australian formats:
- Booleans show as Enabled or Disabled.
- Enumerations show as a readable label, for example Sub-merchant, Next-day settlement or Low.
- Timestamps use en-AU formatting in the Australia/Sydney timezone, with the timezone abbreviation included.
- Currency values use en-AU AUD formatting, for example $200,000.00 AUD.
- Numbers include their appropriate separators and unit where one applies.
- Lists are shown as comma-separated items.
- Objects are shown as labelled property and value pairs.
Where a value is missing, null or undefined, the card shows Not configured. This is distinct from a valid value of Disabled, 0 or an empty list, which are displayed as the actual value. If a value cannot be interpreted, the card shows Unable to display. The remaining cards continue to display normally.
Sensitive values Client Configuration never shows the full value
- Client account numbers and settlement account numbers are masked, with only the final four digits shown, for example ••••••8901.
- API key material is represented as the key type only.
- HMAC values are represented as HMAC key present or Not configured. The HMAC value itself is never shown.
Identifiers that are safe to see in full, such as BSB, BIC, ABN and merchant category code, are preserved in their recognisable form.
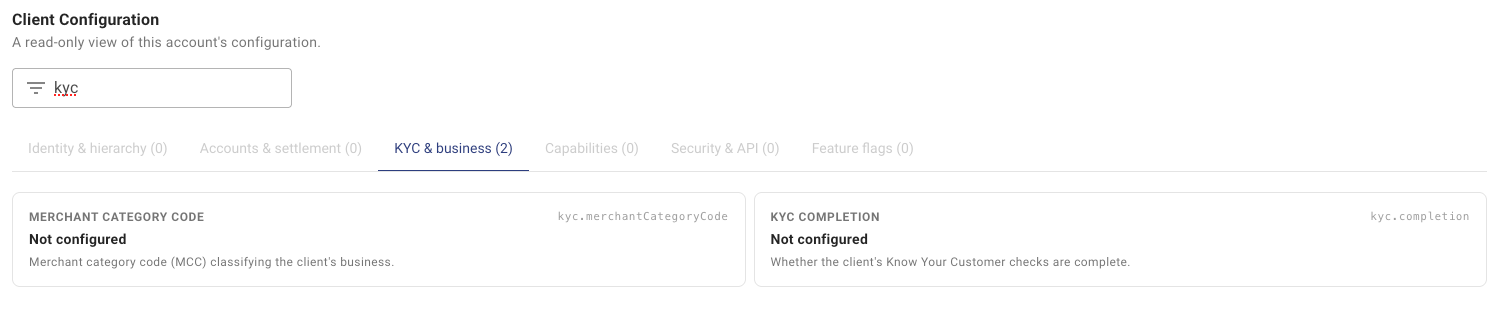
Filter configuration
Use the Filter configuration box at the top of the section to search across all tabs. The filter applies from the first character you type and updates as you type.
The filter is case-insensitive and matches your query as a single continuous substring against:
- field labels;
- config keys;
- explanations;
- displayed values;
- safe raw values.
For masked account numbers, only the displayed masked value or the final four digits are searchable. Sensitive raw values are never searched.
While a filter is active:
- each tab shows a match count in brackets, for example Capabilities (1);
- tabs with no matches are disabled;
- only the matching cards appear in the displayed tab;
- the Capabilities app rows are hidden.
If the tab you had selected has no matches, the filter switches to the first tab from left to right that does have matches. Your previous tab selection is remembered, and is restored when you clear the filter.
If no field matches your query, every tab shows (0) and is disabled, and the cards are replaced with: No configuration matches "{query}". Clearing the filter removes the counts, enables every tab, and restores the full set of fields on the tab you had selected before filtering.
The Settings page's own search box at the top-right of the page searches section headings only. Searching the Settings page for a term such as client can surface the Client Configuration section itself, but it does not search the cards inside it. To search the cards, use the Filter configuration box inside the section.
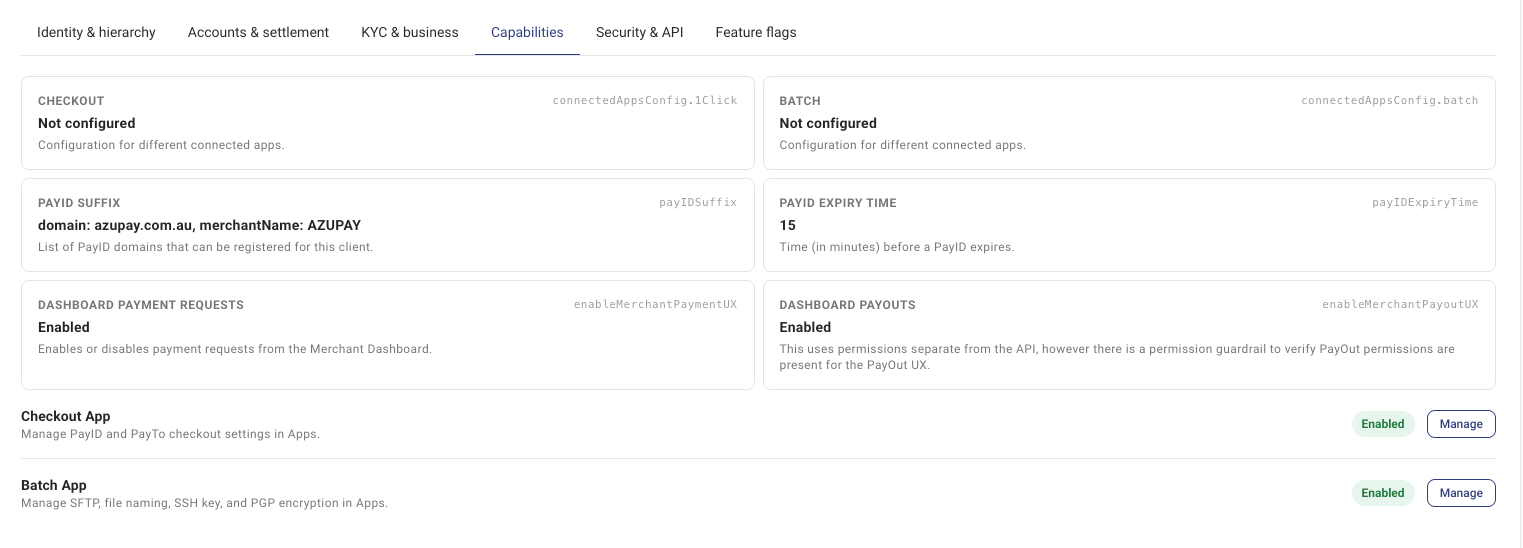
Capabilities tab includes two apps: Checkout App and Batch App
Each row shows:
- a short description of what the app covers;
- a status of Enabled or Not enabled, derived from the selected account's connected-app configuration;
- a Manage action that opens Apps for the selected account.
The Manage action buttons for each specific app redirects you the Apps page in the Azupay dashboard for the selected account. For the app configuration itself, see Managing apps.
Switching accounts
When you switch to another authorised account using the client switcher, Client Configuration clears its cards and filter state, shows a loading state while it fetches the new account's configuration, then displays the new account's values. Values from the previous account are never shown under the newly selected account.
If Client Configuration cannot be loaded
If the section cannot be loaded, the rest of the Settings page remains usable. The section displays: We couldn't load client configuration. Refresh the page to try again. Use the Retry action to retry loading for the selected account without reloading the whole Settings page.
If Client Configuration is not available for the selected account, the section displays: Client configuration is not available for this account.
Updated 17 days ago