
Managing apps
Learn how to turn on Apps, select Variants and customise features of your apps
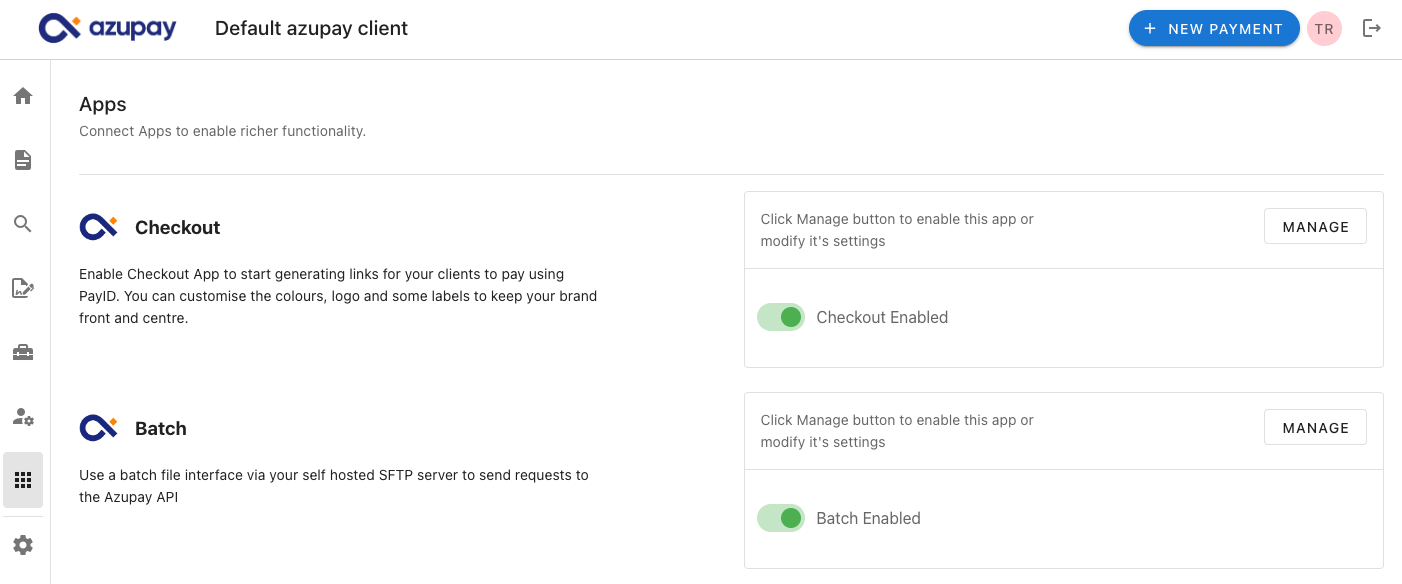
Use this section to select, enable and configure your Apps.
See Our Apps to understand the purpose of each of our Apps, how to implement and how to configure. If you decide none of our Apps suit your needs dive into the API Guides section to understand what you can custom build on top of our APIs directly.
Read on below for a summary of the App management screen in our Client Dashboard.
Enabling apps
Our aim is to make this self-service but we're not quite there on the full journey yet. Turning on a new App usually requires some integration including configuration and testing with our team. Once integration is done you can enable the App when you're ready and in some cases will be able to switch between Variants of the App in your Client Dashboard.
- Login to the Dashboard
- Navigate to Apps
- Find the app you want to turn on and click the 'Enabled' toggle button next to the app name
Customising
You can customise each App with select settings and match your brand by uploading a logo and adjusting colours. For some Apps you will be able to switch between available Variants. Here's how:
- Login to the Azupay client Dashboard
- Navigate to Apps in the LHS panel
- Find the app called Checkout and click the Manage button
- On the Settings tab, you will be able to preview what your current Checkout main landing page looks like.
- Apply any changes you would like and click Save. On the Settings tab - On this tab, you can configure the Checkout app version you want to use and choose the Payment option. On the Appearance tab, you are able to add your business/company logo and set the theme accent colour for the payment landing page (default accent colour is #00000 black.)
- Your changes will be available immediately, and shown to your customers when the payment checkout landing page is loaded.
As client dashboard user, on the Settings tab you can configure the version of the Checkout app you want to display to your customers, either version 2 (v2) or version 3 (v3). Note that if you upgrade your Checkout experience to the newest version 3, you will not be able to rollback to the previous version using the dashboard settings. You will be able to preview what each version looks like before saving changes to the newest version.
Additionally, client merchants are now able to select the Payment option that is displayed on the main payment landing page: either PayID only or PayTo and PayID combined. Note: you will need to have PayTo enabled as a product before choosing the second option.
Not all Apps and features can be seen in the DashboardRecently added functionality or those that may require additional risk and compliance needs or new pricing agreements might not be available in your Dashboard. (For example choosing PayTo as a payment option.)
Contact our Customer Success Team or Helpdesk if you want to know more about any App or feature described in these guides that you don't see in your Dashboard.
Updated 12 months ago